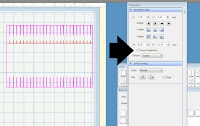
First thing you need to do is set scal2 to 90dpi(inkscape) then everything will cut to size. You can do that via the edit/preferences menu.
Once you've done that import the base.svg There are 2 different widths of base, narrow and wide, both can be dragged to make any depth you want but you must keep the keep proportions box unchecked then drag to the depth you require. Although both will work because the tabs are going to shrink/stretch it's best to use the version nearest to the size you require.
 Once you've decided on the size it's time to import the other pieces, you will need to import the frame twice and the wheels twice if you want to double them up for stability. If you're going to stamp on the sides for decoration now is the best time to do so.
Once cut take the base section and score along the bottom of the tabs.
 Fold the tabs up as shown.
 Gently easy the base over a rolling pin/your arm so that it's gently curved. This will help when it's time to stick to the side.
 Attach some strong double tape around the edge of the 2 sides as shown, don't forget to mirror them.
 Very carefully ease the base into the side sticking the tabs as you go.
If you arent very confident with using strong sticky tape add some stick glue over the exposed sticky and this will give you a small amount of slippy time.
 By the time you reach the top of the hood you should have a piece like this. Firm down the tabs again, just to be sure.
 This always looks like it's going to be tricky but it isnt too bad at all unless you've made the base thinner than an inch. Gently place the other side to the base and use your thumb to attach the tab to the glue. This is one time when you might be glad of stick glue over the dst.
You should now have the main body of the pram assembled.
I tend to 3d decoupage the hood area now but you might prefer to attach at the end.
Usi
 ng some strong dst place on the to top section of the longer parts of the frame and attach to one side of the pram.
 This for me is the trickiest part, lining up the other frame. I find it helps to have the pram stood up so I can judge by eye. You may prefer to stand over and have it flat to the table. It does sometimes help to have one of the cocktail sticks through the central supports.
 We're nearly finished now, just to add the wheels. You can do this in a variety of ways, either sticking them directly to the frame, as in the pics with cocktail sticks or by using brads.
I don't want the wheels to turn so I've chosen to attach an inner and outer wheel and stick them together with some glue gel. Once the gel has had time to set I would either cut the ends of the stick flush or I would leave a small section visible and glue a bead over the top. The handles are shaped to hold another cocktail stick, just make sure there's either a large bead at each end or you use a strong glue to hold in place and trim the sticks.
Top tip... don't use your best paper scissors to cut the cocktail sticks, kitchen scissors make a much nicer job and don't get damaged. Don't ask how I know ;o) lol
No matter which way you go it's essential you remember this pram isn't a toy and it must remain out of reach of a child.
Hopefully I haven't confused anyone on how to put the pram together. If I have just drop me an email at playingwithpaper@googlemail.com and I can talk you through it.
